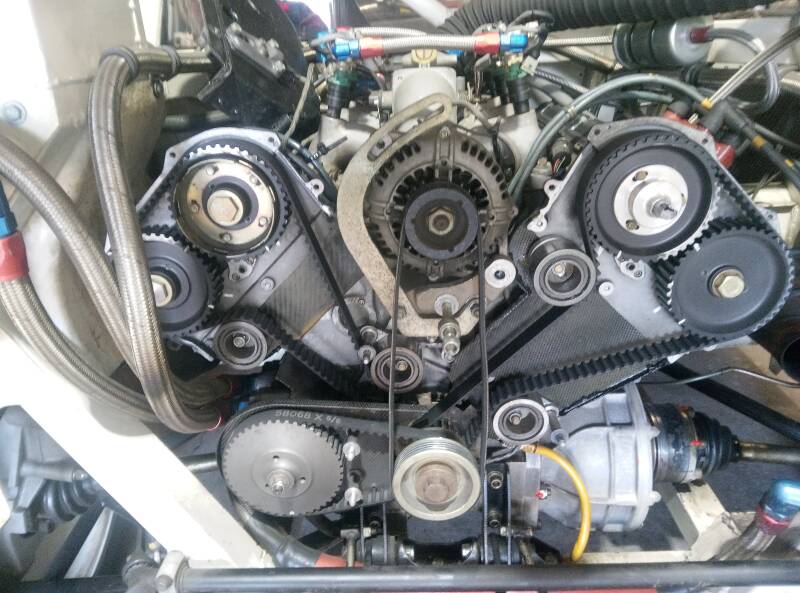
A proper engine - a genuine and original V64V with just 3,000 miles on it.
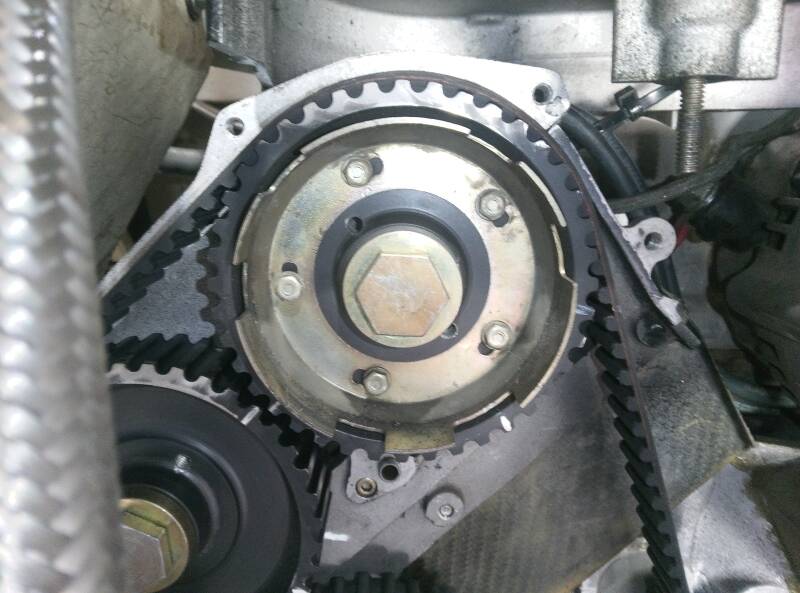
Two sets of timing marks, one by the factory one by person or persons unknown. I was a bit worried that the factory marks on the left bank never really matched perfectly but as it's been like that for 30 years or more I guess it's ok. I couldn't fit the cam locking tool to this pair of cams - it's easy to see why not.

These are the marks we found with the covers removed, somebody has clearly been in here before but we don't know why. When we pulled the oil pump sprocket off it was clear it had been previously removed more than once as there were at least 3 sets of marks where bolts had been used as pullers.
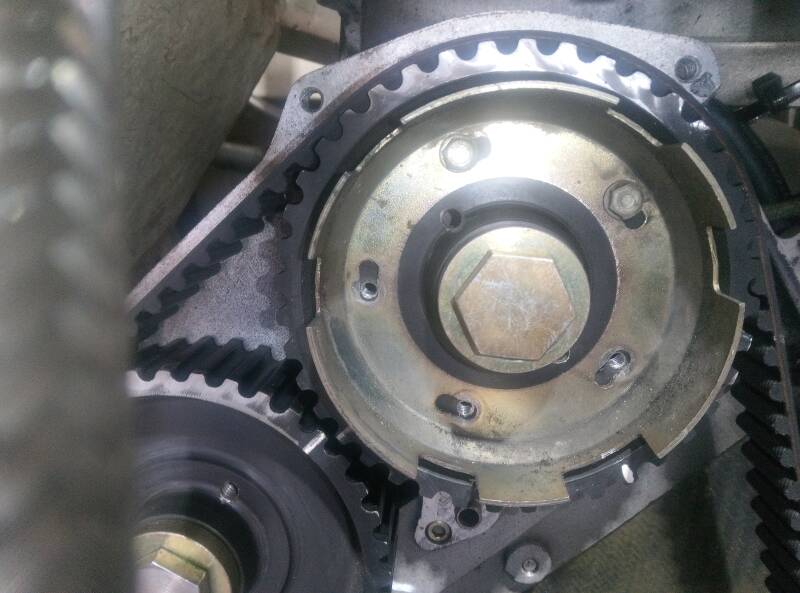
New belt on, locking devices removed, engine turned 4 times, timing marks still line up exactly as before work commenced. Note the bolts holding the cam timing wheel had been removed, I wa hoping we could remove it, it looked like it was 2 parts. It wasn't and removing it would have meant removing the big central nut that holds the sprocket to the cam. I seemed to remember hearing that they are not keyed, didn't fancy it, bottled out. Thinking about it, that might well be why the timing marks do not align perfectly.
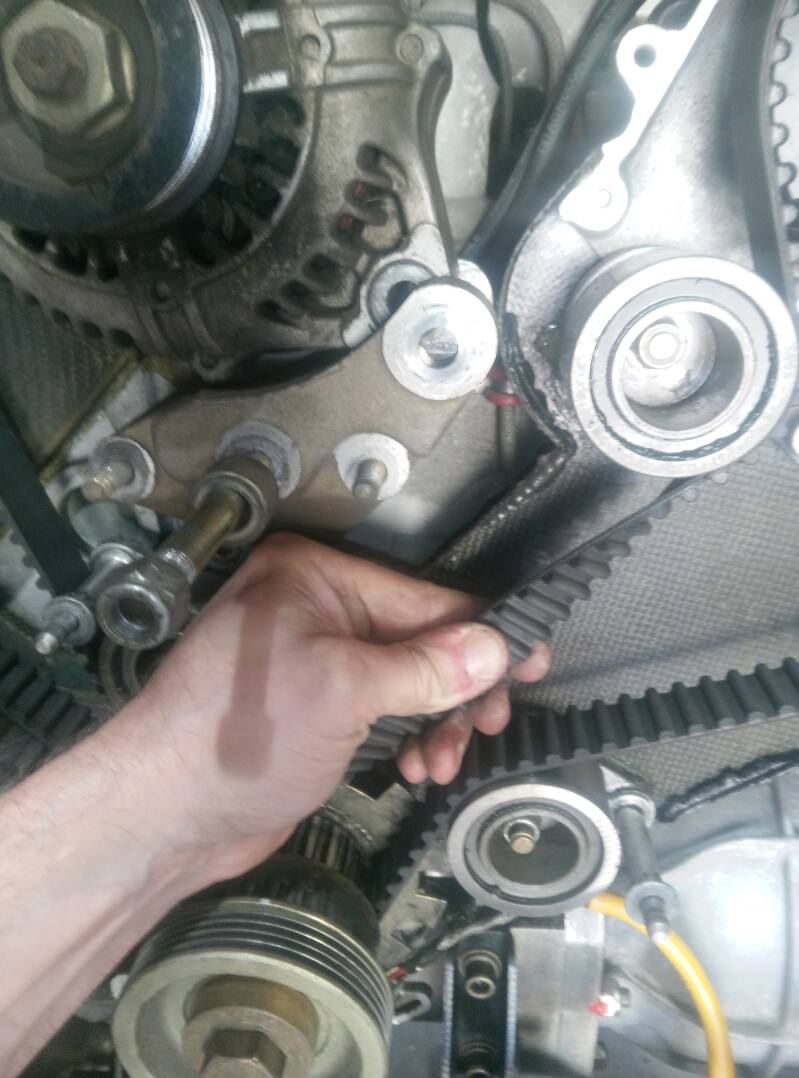
Without any factory figures to go on this is my preffered method of checking cam belt tension. I had been sure to check the tension on the old belts before removal.
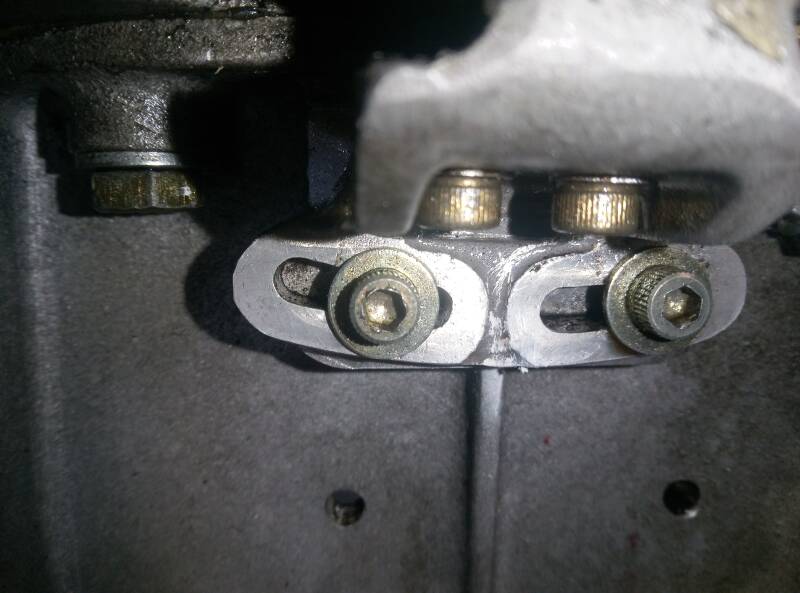
You have to remove the crankshaft position sensor to get the rear belt off, it's vitally important to put it back in exactly the same position as timing pulses are derived from it. You need a 3/16 allen key, when I came to put it back I discovered that our 3/16 allen key was a self hiding model. A damn good one too - it took 2 of us over half an hour to find it.
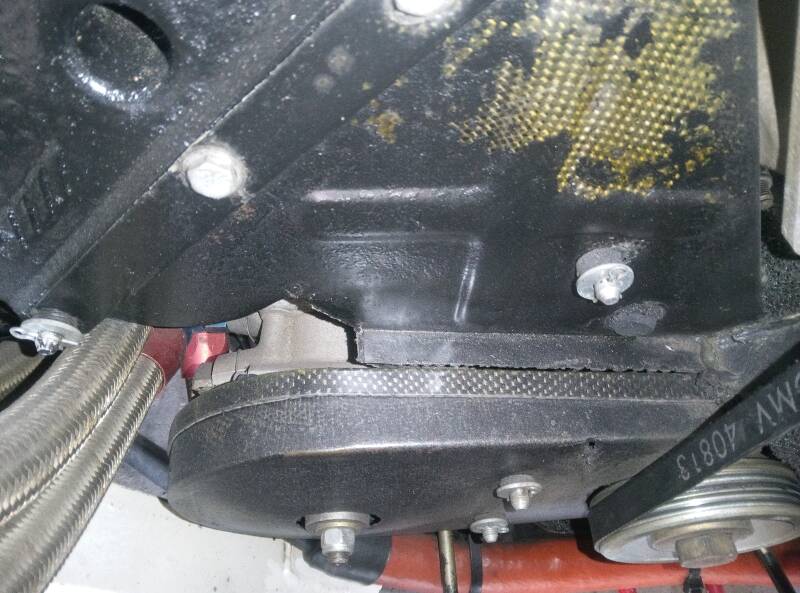
This is the cover over the oil pump pulley, note that it has a hole for the drive spindle and nut to poke through. This is sort of half useful but you still have to remove the cover to remove the belt so you can spin the pump with a drill to get the oil flowing after a long period of standing. As the car will not be raced or rallied we left the cover off when it went back together. Russ painted things up to make it look a lot prettier and cared for.
We have known for a long time that the timing belts on the 6R4 were on borrowed time, even though the car has done less than 3,000 miles they are 40 years old, or we assume they are as Malc has never had them changed and there was nothing in the paperwork to suggest they had been done. The risk to the engine was just too high so it very rarely gets run and when it is fired up it's treated with kid gloves.
At the meet at Prodrive we met a guy called Dr Ian Rowlance who knows pretty much all there is to know about these cars, he owns the ex Colin McRea example, which he restored to an incredibly high standard. As luck would have it he supplies a complete timing belt and tensioner kit for these amazing and very rare cars. I spent quite a while talking to him and it turned out there are two different variants of timing kit - the standard one and what they call the reliability kit set. When the engine was first developed it ran open belts - they had no cover over them and they only had a single tensioner on each bank. Our variant was fitted with the reliability kit which has longer belts, a tensioner and roller on each belt and some kevlar covers to keep foreign objects out of the works. Apparently many a 6r4 engine has been totalled by a stone flicked up in to the works resulting in a dislodged belt and catastrophic engine damage.
Malc ordered a set, which duly arrived and so we could set about getting the job done, which actually turned out to be about 3,000 times easier than I had feared. The cams are at the rear of the car so it has very easy access, you don't need to get the engine out or anything like that. First job is to remove the exhausts, only the silencers, the headers remain in place, it's just a few bolts and away they come with their mounting brackets. That little job took literally 10 minutes and with them off the job already looked half done. The Kevlar covers were next, there are essentially two aluminium covers for the cam sprockets and then two further Kevlar covers for each belt and two that form the protection for the oil pump and drive belt - a replacement for which is included in the kit. Next is the alternator belt - this is the hardest one as there was a rib on the alternator that stopped it from rotating far enough for easy removal of the belt. I had to remove the bracket in the end to allow enough slack, with that done it fell off with very minor persuasion, no pickaxe or sledgehammer required.
With all that removed I could see for the first time what the sprockets looked like and decide what was the best tool to lock them up with - the thought of getting this wrong was causing no small amount of anxiety, you can't nip to the scrappy and get a spare engine for one of these. The two cam wheels are very close together, one has a toothed device for picking up cam timing pulses, 3 have tapped holes so you could put in bolts to lock them to the engine, one (inlet bank 1) did not. As I understand it at TDC cam 1 will not spin but the other 3 will, I am not taking any chances. I noticed that although the cams have factory marks on them somebody has been in there before and added their own marks, I have no idea why they did that. I added some fresh white paint to both sets of marks to make 100 per cent sure that if anything did move I could still get it back to where it was before I buggered about with things. I chose a universal locking tool that has two sets of locking devices - 1 that locks 4 points between the two cam wheels and a secondary set of 4 screw down locks as a belt and braces solution. 2 sets of tools were purchased so I could lock both pairs of cams and the crank pulley all at the same time. Nothing should move with that lot in place, at a cost of under 15 quid and for 10 minutes work it seems like very cheap insurance.
The only other thing you have to do is remove the crank position sensor, which sits at the bottom of the engine and is very easily accessible. It's fixed with 2 allen bolts, this is where things get a little annoying as some fixings are metric and others are imperial so you need 2 sets of tools when doing any jobs on these cars, it's no biggy but worth knowing before you start. It is essential to mark it's position before removal, it has slotted mounting points and the ignition timing depends on it being spot on. I used tyre paint, which is bright white, shows up well under strobe timing lights and dries really quickly. Tippex is a good alternative if you can find it anywhere.
You can use the method of cutting the existing belt in half but given that you have to have the tensioners and guide rollers off to do the job properly I did not persue that method.
There is no manual anywhere that tells you how to do the job, there is nothing written down that tells you the tension to put on the belt, the torque settings of the tensioner mount bolts or anything else for that matter. I tested the belt tension before removing anything so I can be in the right ball park when it all goes back together. That's the method Ian used on his 410bhp 9500 RPM version and he gives that a proper schooling without any belt related naughtiness so it should be good on our 7500 RPM clubman version. The age old check of two rotations of the crank by hand will check that everything is nicely settled and perfectly in line before attempting a start of the engine. It will be run with the covers off initially to double check everything is hunky dory before final reassembly.
It was a few days between taking things to bits and getting the universal cam clamping kit, which turned out to only be usable on the right hand cam pair as the left hand one has the cam position sensor located on the inlet cam, which made fitting impossible. I had to use a combination of the cam lock kit and locking bolts to make sure nothing moved. The tapped holes in the sprockets were some imperial size, I have no idea what it is but we had a box full of them that came off the old AMF bowling alley machines that had been upgraded some years back. Never throw anything away, guys, it took 15 years but they came in handy eventually. We have a few hundred if anybody needs some LOL.
With everything locked up solid and marked clearly the old belts could come off. I was still a bit concerned that the sprockets on he left side didn't match up exactly, the later hand made marks did but the factory marks were about 1/4 tooth out. As they are relative to the teeth on the belt it's impossible to turn them less than 1 tooth so I went with putting it all back exactly as it had come off, it had been ok for at least 30 years so I knew it had to be good.
With it all back together and the belts tensioned to the same as the old ones I did they age old accepted method of turning the engine over by hand at least 720 degrees - 2 full turns - before rechecking everything. I did this twice to satisfy my paranoia. It all still matched perfectly so we spun the engine over on the starter rechecked everything again and then put the distributor cap back on ready to go for a test start. I would stress that before we did that we spun the oil pump up for a minute to make sure any excess oil in the sump had been drained back to the reservoir and oil had reached the top end. The toothed belt for the pump was then put back on before we went for a start. We left the outer cover off, the car won't ever be rallied and it's just so much easier to prime the oil pump without having to remove the cover every time the engine gets started after a long lay off.
So with everything back together, checked and rechecked and then checked again we went for the start up. She fired up straight away and sounded as sweet as ever. I haven't been so relieved since my last mental health check revealed that I haven't got any worse and that the rash wasn't contagious. We let it run for a few minutes, gave it a few revs, nothing silly and then decided it was all good and put it away until the next show or whatever. Very happy that it's over, it's always a privilege working on these wonderful cars but it's also very stressful due to the lack of information, the rarity of parts and the massive expense if something goes wrong.
Add comment
Comments